Sovol 3D SV01 – With Direct Drive Extruder
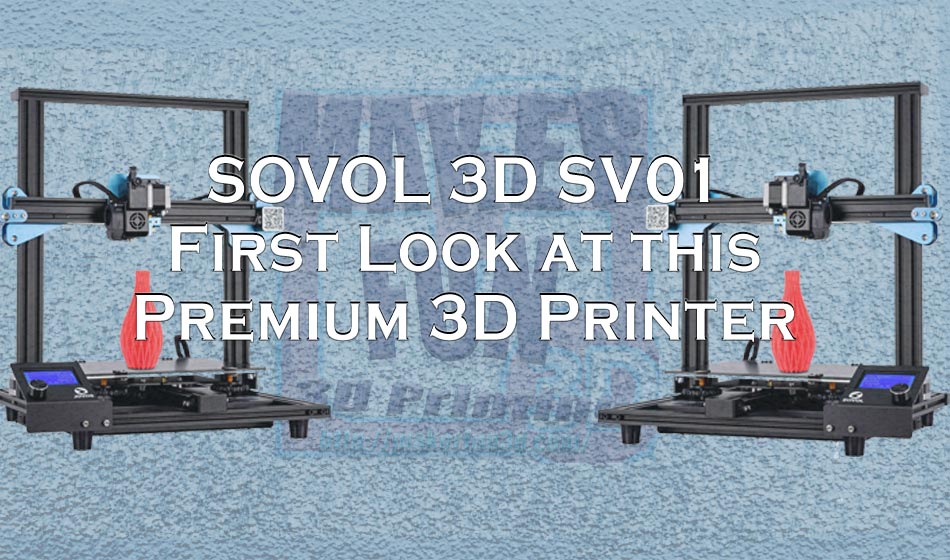
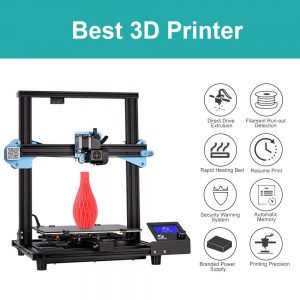 Sovol 3D is a new company bringing 3D Printers to consumers (find the SV01 on their site or find it on Amazon). What really sets this one apart, is that it is a direct drive extruder setup for FDM Printing. This is not something you see a lot on these consumer printers. Most are using Bowden type extrusion. Direct drive allows you to print more filament types, easier, like very flexible TPU filaments. The SV01 is even set up to accept a BL touch for auto bed leveling. Retail on the printer is now $299.00 for its regular price.
I have now put one together and am printing on it. This thing is beautiful. Largish bed (not quite 300 mm x 300 mm x 300 mm of the CR10, but close). Tons of features that refine the 3D Printer. I am honestly very impressed with the level of polish this 3D Printer has. Currently, it is averaging about 103 Watts during use. This is a pretty respectable number compared to other 3D printers.
Key Features of the Sovol 3D SV01
- Direct Drive Extruder
- Build Area: 240 mm x 280 mm x 300 mm
- Meanwell Power Supply
- High Quality Glass Bed Printing Surface (Think Ultrabase like)
- Creality 2.2 Main Board
- Dual Z Lead Screws
- Power Off Resume
- Filament Run-Out Detector
- Thermal Runaway Enabled
- Comes with a hot end silicon sock
- Very helpful group on Facebook
 That is a lot of premium features in a low-cost 3D Printer solution. Most printers don’t have dual Z lead screws, let alone Meanwell power supplies in this price range. It also has a larger build volume than the standard Ender 3. You can purchase them direct as well as Amazon, AliExpress, or Ebay.
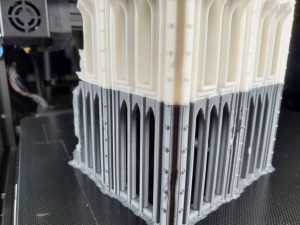
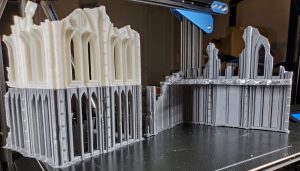
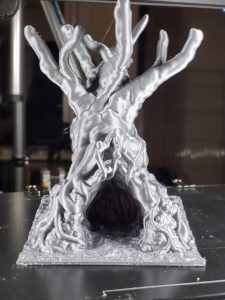
I know I am excited to try out a direct drive printer, and I think I will need to pick up a BLtouch for this, since it has support baked in. I’ve already got several pieces from the Warlayer 4.0 Kickstarter and the upcoming Corvus Games Terrain Kickstarter to test this printer on.
UPDATE 9/6/2019: This 3D Printer has quickly won me over. It’s built strong. It’s got a number of premium features. It’s got a VERY generous sized bed. There really isn’t anything to complain about. In my use of the 3D printer, something that has stood out, is their attention to detail. The user experience is well thought out. The power switch, is a large rocker switch on the side that is easy to reach and find without looking. It uses micro SD which I don’t prefer, but it works ok, but it is mounted on the front and easy to get to, alongside the mini USB port. The control knob on the display just FEELS good. It has a good, solid CLICK. This is the beginning of the next generation of 3D Printers. The low-cost printers are out there, but now, we will be seeing an increase look at the user experience. Cheap is no longer the key for differentiation… these companies will have to design better for users. While the Prusa i3 has done this for years, and charges a premium for it, the SV01 is a low-cost, consumer focused 3D Printer. I even want to buy more of their filament since it prints so beautifully. When is the last time you purchased a 3D printer and loved the filament so much, you wanted more?
Download the Manual – Firmware Source Code
If you want to download the manual, go to their Firmware Download page under Support. If you want to see what is needed BEFORE getting your printer, this is your chance. They also allow you to download the Marlin source code for the printer. This is part of the Marlin licensing agreement, and not all 3D Printers do this step. Very happy to see them stepping up to do the right thing here.
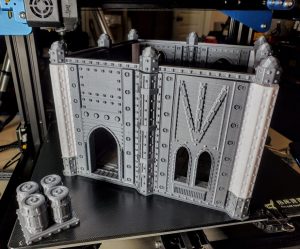
First Print – Warlayer Containment Container
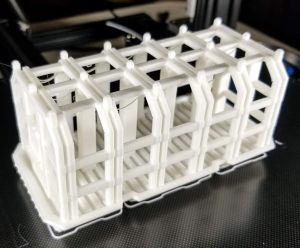
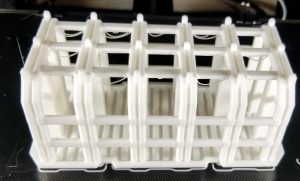
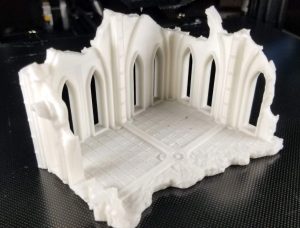
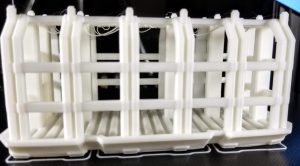
My first print on new FDM printers has been this Warlayer Container for some time now. I like it since I can see how the bridging is and how well it prints. You can see a bit of stringing from the bridging. This really is not bad. It takes a pretty powerful cooler to avoid this. It does quickly get fixed. the prints themselves are very nice. Very smooth surface, very clean lines. I am very happy with this first shot.
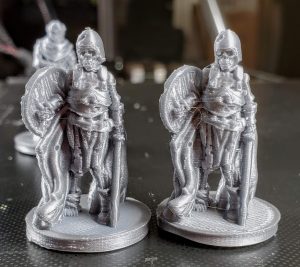
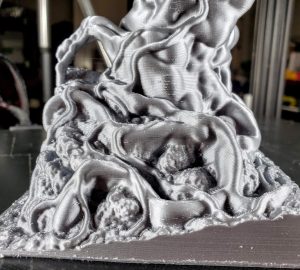
My Miniature .08 mm layer height Cura Profile
I put together this profile for printing minis. It is based on the Ender 3/5 miniatures profile from Fat Dragon Game tweaked for the extruder on the SV01.
For setting up Cura for this printer, they recommend using the Creality CR-10 profile. Rename it to SV01 and add the printer. Then, change the machine settings to X: 280, Y: 240, Z: 300
Their End gcode recommendation is this:
G91
G1 F1800 E-5
G1 F3000 Z10
G90
G28 X0 Y0 ; home X and Y Axis
M106 S0 ; turn off cooling fan
M104 S0 ; Turn off extruder
M140 S0 ; Turn off bed
M84 ; disable motors
 |
 |
 |
 |
 |
 |
 |
 |
 |
The Ender 3 Pro has several upgrades over the venerable Ender 3. It takes the classic and upgrades it with several nice features. That includes a 40×40 aluminum extrusion for the Y base, a Meanwell Power Supply. The SV01 comes with the Meanwell power supply, the 40×40 aluminum extrusion on the Y, as well as further extrusions across the printer to increase the stability of the printer. The SV01 has an Ultrabase style glass bed which is a great bed type. The Pro has a magnetic bed and the Ender 3 x has a tempered glass bed. The SV01 has a 280mm x 240mm x 300mm build volume compared to the 220x220x250 mm of the Ender 3 platform. The SV01 packs even more features like an upgraded main board, power off recovery, filament run out sensor, dual Z screws AND a direct drive extruder. Since the Ender 3 is the biggest low-cost 3D Printer on the market right now, I thought it would worth giving a run-down of the differences and what sets the SV01 apart. Basically, the SV01 has all the features of the Ender 3 pro, plus several additional “upgrades”.
Unboxing and Live Build
After unboxing this, all I can say is WOW. Very solid 3D Printer. Lots of “polish”. They don’t reinvent the wheel, they refine it. Check out the video.
https://youtu.be/gRj6pIB_axw
Hot End tear down
Sovol has put together a video showing how to take the hot end apart to get in and remove a clog.



Does sovol sv01 support the octoprint?
It has a USB port, so it can. If you use Octoprint, you lose the power off/resume and filament run out capabilities. I LOVE Octoprint, but I am reticent to use it on these printers with more capabilities.
Hy,
what are your Start-G-Code ? Do you change something at the End-G-Code?
Because, if i Setup the Printer in Cura with the Profile of CR-10, i get a different End-G-Code like yours:
Here are my codes:
Start:
M201 X500.00 Y500.00 Z100.00 E5000.00 ;Setup machine max acceleration
M203 X500.00 Y500.00 Z10.00 E50.00 ;Setup machine max feedrate
M204 P500.00 R1000.00 T500.00 ;Setup Print/Retract/Travel acceleration
M205 X8.00 Y8.00 Z0.40 E5.00 ;Setup Jerk
M220 S100 ;Reset Feedrate
M221 S100 ;Reset Flowrate
G28 ;Home
G92 E0 ;Reset Extruder
G1 Z2.0 F3000 ;Move Z Axis up
G1 X10.1 Y20 Z0.28 F5000.0 ;Move to start position
G1 X10.1 Y200.0 Z0.28 F1500.0 E15 ;Draw the first line
G1 X10.4 Y200.0 Z0.28 F5000.0 ;Move to side a little
G1 X10.4 Y20 Z0.28 F1500.0 E30 ;Draw the second line
G92 E0 ;Reset Extruder
G1 Z2.0 F3000 ;Move Z Axis up
End:
G91 ;Relative positionning
G1 E-2 F2700 ;Retract a bit
G1 E-2 Z0.2 F2400 ;Retract and raise Z
G1 X5 Y5 F3000 ;Wipe out
G1 Z10 ;Raise Z more
G90 ;Absolute positionning
G1 X0 Y{machine_depth} ;Present print
M106 S0 ;Turn-off fan
M104 S0 ;Turn-off hotend
M140 S0 ;Turn-off bed
M84 X Y E ;Disable all steppers but Z
What will be the best Settings? Sorry, i am new in 3d printing.
Thank you
This is my start gcode:
; Ender 3 Custom Start G-code
G28 ; Home all axes
G92 E0 ; Reset Extruder
G1 Z2.0 F3000 ; Move Z Axis up little to prevent scratching of Heat Bed
G1 X0.1 Y20 Z0.3 F5000.0 ; Move to start position
G1 X0.1 Y200.0 Z0.3 F1500.0 E15 ; Draw the first line
G1 X0.4 Y200.0 Z0.3 F5000.0 ; Move to side a little
G1 X0.4 Y20 Z0.3 F1500.0 E30 ; Draw the second line
G92 E0 ; Reset Extruder
G1 Z2.0 F3000 ; Move Z Axis up little to prevent scratching of Heat Bed
; End of custom start GCode
This is my end code (from Sovol’s recommendations):
; SV01 Custom End G-code
G4 ; Wait
G91
G1 F1800 E-5
G1 F3000 Z10
G90 G28 X0 Y0 ; home X and Y Axis
M106 S0 ; turn off cooling fan
M104 S0 ; Turn off extruder
M140 S0 ; Turn off bed
M84 ; disable motors
; End of custom end GCode
You can tweak the code. I thought the slicer set the first part of the code (jerk, acceleration, etc), so you shouldn’t need that, I don’t think.