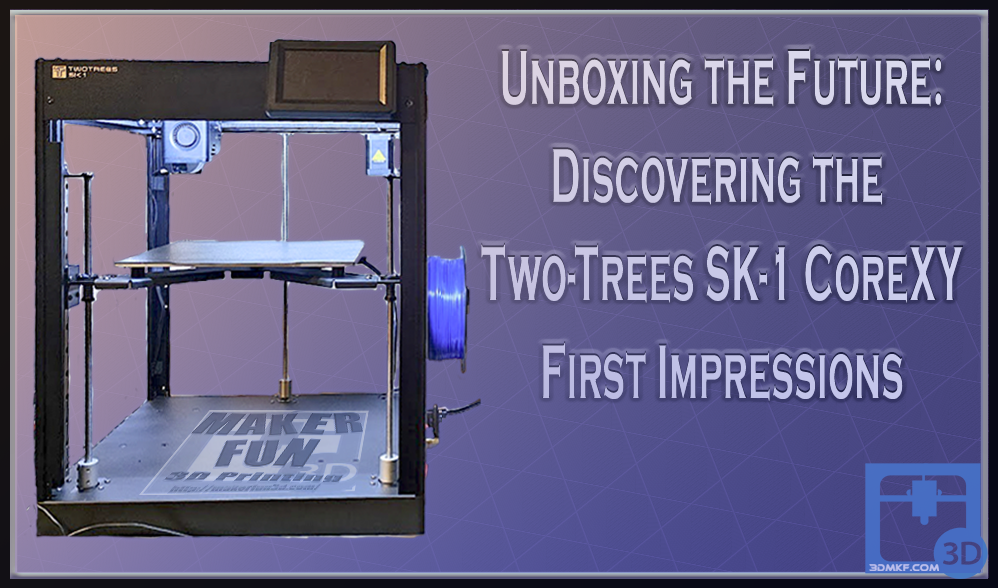
SK1 one of the best 3D Printers I have used
PLEASE NOTE, this is JUST a preview. So, this sentiment MAY change, but, so far, this is probably the best 3D Printer I have used.
First, my disclaimer: TwoTrees reached out to me and asked me to give an honest review of their 3D Printer. I am very thankful that they sent the 3D Printer for me to test out. I have not been paid to complete this review. The site has been on hiatus, since I got burned out producing for the website and I had a new job. The new job is now a couple of years old and I have a groove. Doing this review has relit the fire for 3D Printing in me, so I am also very appreciative of TwoTrees for that.
SK1 Unboxing : A little rough, but it wasn’t difficult.
Let’s start out with the Unboxing: https://youtu.be/wj4x6uGc5i8. I completed the unboxing in just over an hour. But, realistically, the printer comes fully assembled. You need to take some pieces off that hold the printer together for shipping and then add on the display, filament holder, and screw on the WIFI antennae. It was SIMPLE.
They asked me to upgrade the firmware, so trying to get that figured out took some time. But I got through it. I finally realized to use the card that shipped with the printer, not the thumb drive I had created earlier to update the firmware. Simple fix, but it took me a bit to realize what to do. So, that one was all on me.
Watch that video above to see the unboxing and hopefully get by a few snags that I ran into.
What is the SK1?
The SK1 is the latest 3D Printer from TwoTrees. At this moment, you can get in on the pre sale for $565.00 USD. (They are running a 3% off sale as well with code TT3). The printer launches at the end of this month.
The SK1 is a CoreXY workhorse.
If you read my SK1 Unveiled post, you already know this information. For those of you that have not, lets go over everything that sets this 3D Printer apart, and makes it what it is.
- Speed: Boasting a speed of up to 700 MM/S, the TwoTrees SK1 is impressively fast. Note: Opting for slower speeds can yield higher-quality prints. You have to love the speed you can get running a CoreXY 3D printer.
- CoreXY: The CoreXY system is robust and sturdy, ensuring stability and reliability.
- Build Size: Generous build volume of 256 mm x 256 mm x 256 mm.
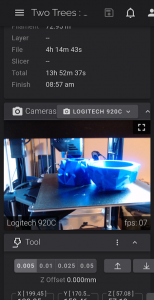
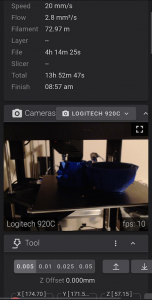
- Klipper Firmware: Outfitted with Klipper firmware, the SK1 streamlines the printing process, eliminating the need for the outdated Merlin interface. This upgrade enables remote printing and monitoring capabilities (webcam required).
- Mesh leveling: A standout feature is its mesh leveling, complemented by three Z-axis screws for advanced bed leveling and offset control, achieving near-perfect print foundations.
- Linear Rails: Constructed with linear rails, the SK1 enhances the precision of your 3D prints.
- All metal hot end: Features an all-metal hot end for rapid heating.
- Direct Drive: Equipped with a direct drive print head, the SK1 expands your material printing options.
- PEI magnetic bed: Its PEI magnetic bed simplifies print removal.
- LED Light Bar: An integrated LED light bar ensures visibility of your prints in any lighting condition.
Why choose the SK1?
If you want speed, precision and ease of use, this is the 3D printer for you.
- It comes mostly assembled. The instructions are 4 pages long. I had to add 4 screws, and pull some out (that were holding the linear rail in place. ) That was basically it.
- It uses Klipper. It has a wireless connection. Slice your part, connect to the printer and press go.
- It’s CoreXY. It is beefy and solid. Seriously, this thing is built like a rock.
- It can print FAST. Now, I have not played with this much, but it is able to be pushed fast.
- Those are all cool, but want to know what is really the secret sauce to this printer? Automatic bed leveling. Now, I can level a bed quickly. Even watchin the brim print. But this thing has mesh leveling that adjusts 3 points for more precise leveling. This is really amazing. Slice, send, click print, check back a bit later. That has been my workflow. It is difficult to overstate just how awesome this is.
- The bed cools down, prints pop off. SUPER simple.
- I found out it had a print run-out sensor. Remember, ALWAYS look at your spool to make sure there is enough filament.
How does it print?
This is probably one of the most important questions.
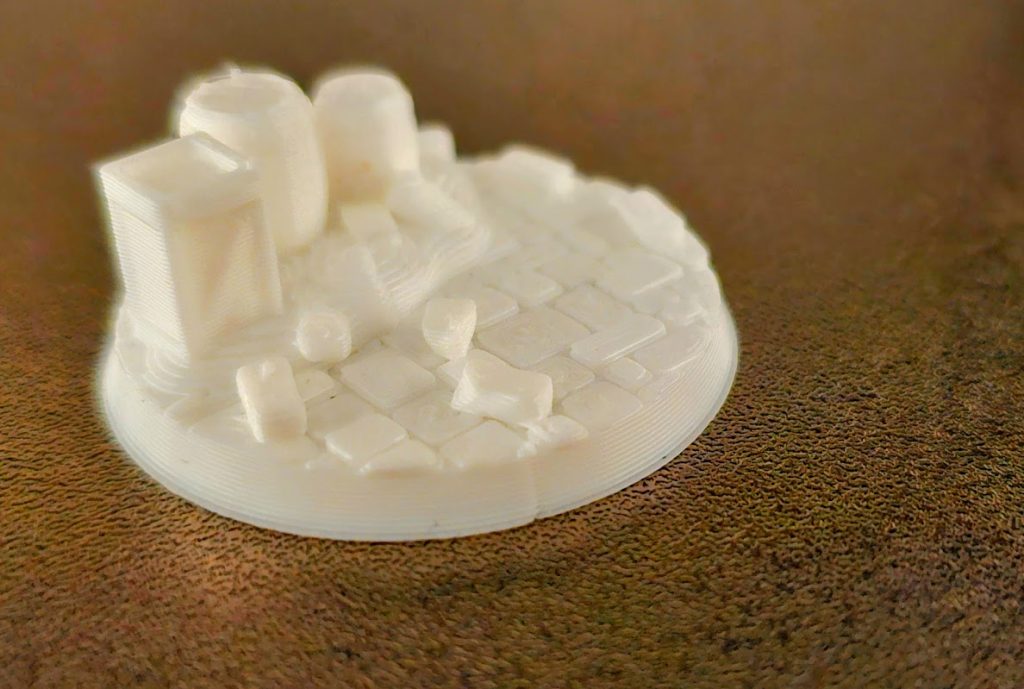
First up, is the first print I did. A small miniature base. This is pretty zoomed in, so you can see how uniform the lines are, and how good this looks. I was really happy with how this one turned out. It shows that this printer can print fine details well.
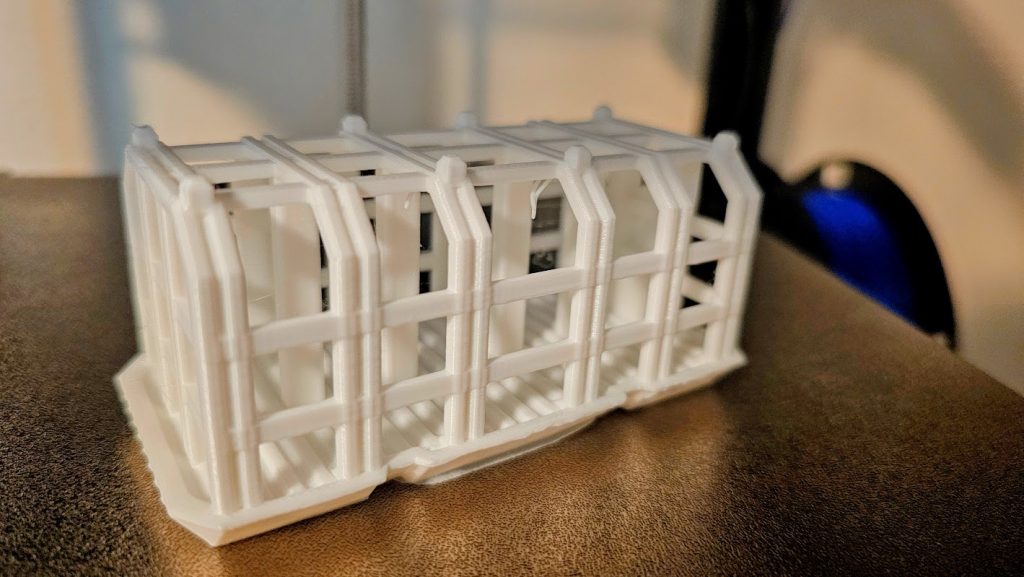
This is my Go-to for every new 3D Printer. It is the Livestock container from Warlayer. You can see there was a little problem with the overhang, but honestly, this is pretty minor for this particular STL. It printed great, and looks good.
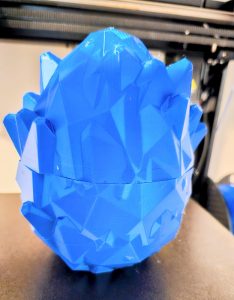
The final print came off the print bed this morning. This is one of the dragon eggs from the Cinderwing 3D collection. My wife had been having me 3D Print articulated dragons for various friends for Christmas, and she really wanted to have this printed as well.
Side-by-side. One with lights, one without.
Lights On
Lights Off
As you can see, this prints really well. I am still in the middle of testing it, and need to produce a bunch more prints. This is just the beginning. But, it is quickly becoming one of my favorite FDM 3D Printers. (even surpassing my previous favorite, Sovol SV01.
This printer has a lot going for it. Klipper, CoreXY, Direct Drive Extruder, Amazing bed leveling.
It sounds too good to be true.
It’s a bird, It’s a plane, no, that is the fan.
So far, I have talked about all the good. It’s not all perfect. It does have some flaws. By far, the biggest, is the case fan. Holy cow it is LOUD. I have my Elegoo Neptune 2 sitting next to it, and it doesn’t make a peep in comparison. That also means my Neptune 2 will be going back to work as I use the SK1 as my main home FDM printer. It is in the room next to where we watch TV, and even my wife has commented on that. I SUSPECT that I will be able to open it up, and replace that fan. That seems pretty minor, but annoying.
You can’t touch this
While the headline my conjure images of parachute pants, the printer doesn’t wear them. Instead, the display will freeze up, and not respond. That is very annoying, especially when it has an error sounding. But, it seems like the Klipper online interface continues to work. So, not all is lost. It’s annoying, but again, kind of minor overall. I have found the display to be a bit laggy at times, as well.
Instructions are difficult
This one isn’t too bad, since the instructions are really simple. But, they are difficult to understand. One step showed removing screws that were not there, which caused some confusion for me. The pictures are good, but not terrific. The illustration I could not really understand. They may fix these before they ship, but in all honesty, you don’t need the instructions. If you watch my build video, you can even see all of the steps being done live. Also, use their thumb drive. It is configured already for their system.
Errors…
In the short time I have run the 3D Printer, I have run into two errors. I am letting you know the good and the bad, but I want to let you know, that I don’t explicitly blame the printer. The first, was a problem with the STL file I slice. It would not even start. Every other file has printed great. So, while I am disclosing the problem, I really do think that the file itself had problems.
Next, my wife came home and called me to tell me the print had stopped and was making a really loud noise. It ended up being an error. I can see there was an error in the online interface, but I don’t know what it was telling me. What HAPPENED, is the print came loose, and was stuck to the print head. A few hours before, when I checked on the printer, one of the legs had come loose. I tried taping it down. I suspect some extra filament snagged on it and pulled the print off the bed (It releases easily). It then melted onto the print head, and I am assuming that it had a thermal code that caused it to shut itself down (which is good).
I have had a few problems with prints releasing. I’ve started increasing the print bed temp to 62 instead of 60 and have wiped the bed down with rubbing alcohol. The last print worked well after that.
So, while I have run into two errors (Being 100% candid to you, dear reader), I am not convinced the printer was at fault. If anything, it worked perfectly with a thermal runaway after having the print stick to the print head, causing it to stop printing and cool down. Not to mention with the perfect bed leveling, prints literally pop right off as it cools down.
I do want to mention heating. This things cranks the heat up FAST. I have my Neptune 2 sitting next to it, and the time to print, including mesh leveling every time (I am pretty sure I can turn that off, and should) it starts printing first.
TL;DR – TwoTrees SK1
I hope you have enjoyed this review. As you can see, this is a solid 3D Printer with some awesome capabilities. It gets rid of one of the biggest 3D printer annoyances (at least my big annoyance) with great bed leveling. I’ve had other 3D Printers that have bed leveling, but honestly, how a CoreXY works, this is probably some of the best you can get. It has a lot of advanced features from running on Klipper, being a CoreXY, and have an all metal, direct drive extruder. If you are looking for a good price on a good printer, have a look at this one. Check back here for the full review after I have run it for a few more weeks. I will say, in the first week of printing, it has been very successful and I really like it. It has a few quirks, but honestly, nothing that can’t be overcome with a new fan and some firmware updates.
Links!
Here are the links from earlier in the post:
TwoTrees SK1 Website: https://shareasale.com/r.cfm?b=2465684&u=2136835&m=128497&urllink=&afftrack=
(Affiliate link, to help pay for the site)
My Unboxing Video on Youtube: https://youtu.be/wj4x6uGc5i8
One last thought. I had a little problem understanding the translation for flashing the firmware. Again, not tough, but when I ran into some issues, they had me second guessing myself. I found that passing their Chinese version of the instructions through ChatGPT made a better translation into English. Very easy, very simple, and very effective.
Ultimately, while there were a number of… bumps, none were bad. And quite honestly, compared to a few years ago, these errors would have been welcome. I literally spent just over an hour unboxing this printer, while talking to the camera. Being interactive generally makes builds take significantly longer. These are easy and quick to assemble.


