Remote Printing – Run your printers while away from home or the office
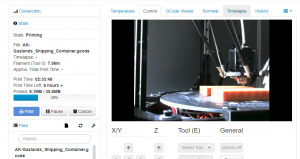 Remote printing lets me run my 3D printers from anywhere. I tend to keep my printers running, maybe not 24×7, but pretty close. With multiple printers, it is rare to find my printer room with out a print running. But, I also have downtime on 3D Printers that sit idle. This article is about the hardware and software I use to remotely fire up prints from wherever I am at, if I find something cool I want to print.
So, a little background. This morning, Steve from Corvus Games Terrain showed a photo of his new WIP, some shipping containers for Gaslands. I asked him if I could get a copy since I tend to show off a lot of his terrain. He was gracious enough to send me the STL file. Now, I was at work, and had a few minutes during my break to get this going. Heading home, a 25 minute one-way trip was out of the question.
January 2023 update: Since I wrote this, Raspberry Pis have become VERY expensive, and the Minton Beagle Camera has come out. Truthfully, $79.99 for a device that replaces the camera AND Raspberry Pi is the way to go.
Getting the file there and Sliced for remote printing
So, I started with the easiest part. I saved the file to Dropbox. That synced it up to my home account. I could have used numerous others, or just emailed it home.
From there, I had to slice the file. Since slicers are not standard on workstations, I had to remote into my computer at home. I use to use Teamviewer, but they have been false flagging a lot of users (including me) as commercial users. The process to look at usage is long and painful, so the tool has become mostly useless. As an alternative, I use Chrome Remote Desktop. It opens up your page in a screen and seems to work well. As an alternative, there is also Anydesk. After remoting into the computer, I use Cura or Simplify 3D and slice the file to upload to the printer.
Turning the Printer and and Printing
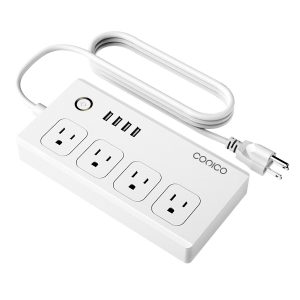
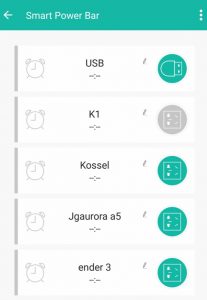 I run my printers off a WIFI Smart power strip. Since I wrote this article, there are some more sophisticated ones out there like this surge protector, or a smaller, less expensive version. This power strip lets me power on each 3D Printer separately, using an app on my smartphone. It uses the app called Jinvoo Smart to control the 4 power outlets, or the USB. That brings me to my biggest complaint, that the USB is all on or all off.
I also have a Wemo Insight power plug that lets me record the power usage of a printer as well as giving me the ability to remotely turn it on or off. Whatever printer is on my table to setup or work on, gets run through my UPS and it runs off this outlet. Unfortunately, it looks like the Insight has been discontinued. This is a KASA version that is similar.
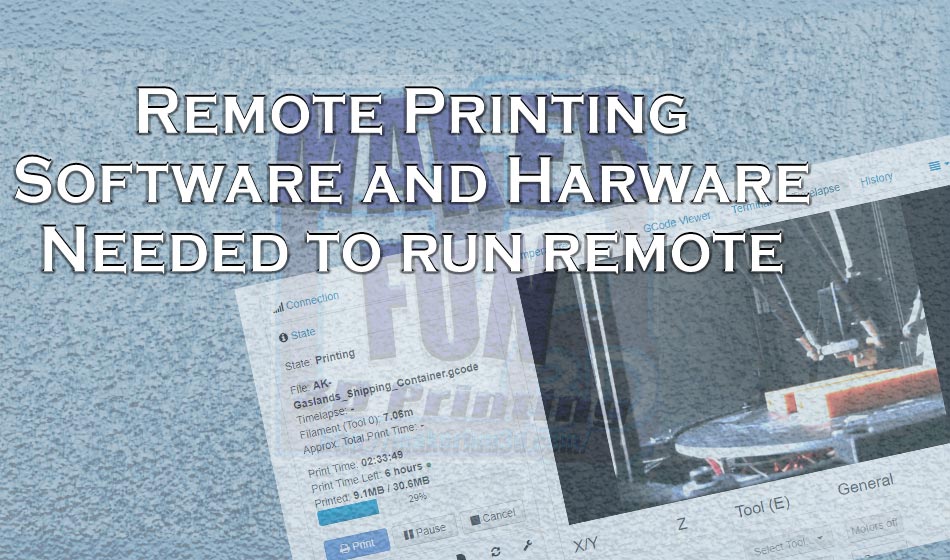
That also brings me to my remote printing setup, I use Octoprint (You can read more about setting it up, and running your 3D Printer off it, from this previous article). As you can see in the photo above, I use Octoprint to run my computer. It allows me to monitor the print jobs remotely, to make sure they don’t fail. Plus, in this instance, I can remotely fire up my 3D Printer and have it start from a location that is not home.
Wyze Cams – Remotely monitor a printer, or print farm
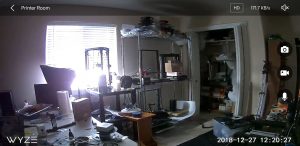 I use a Wyze Cam that I recently received to monitor my print room. I first heard about them in this article from Inov 3D and decided to give it a try. (It was also $5 with an Amazon Alexa device I ordered). The first one I received was a basic cam. It worked great. I have since upgraded to the Wyze Cam Pan, allowing me to “look around” the room. This is pretty cool, since I can mount it in a central location and monitor the room. They can record video, or even time lapses which are pretty cool. They are not quite as integrated as an Octopi would be, but they do allow me to remotely monitor my printer setup, and that includes printers I have not set up with Octoprint yet. The Wyze cameras are really simple to set up (probably the simplest IOT device I own.
The Wyze Cam is about $25 in the US via Amazon. To me, it is a great price for a great product. Now, bear in mind, I’ve only been using these for a month or so… but I went from 1 cam to 2 cams and 2 pan cams in the past month. This is for printers, and to put around my house outside.
The Wyze Cam Pan gives you an all-around view. It piviots nearly all the way around and the camera is wide enough to cover the gap. It also looks up and down. This is what is actually in my printer room, monitoring prints.
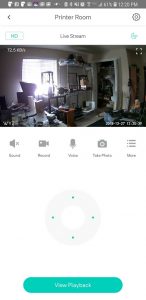 Both cameras shoot in HD but can be dropped down to SD or 360 to reduce bandwidth. I tend to run in SD and up it if I need more detail. These both also work beautifully at night. The quality of the video does not seem to dimenish when in IR mode. The biggest issue I run into in this mode, is having something close to the camera, it tends to “blow out” the camera brightness and anything behind it is in the dark. This is not something I consider a problem with the cameras, something I have to keep in mind. Another nice couple of features, you can put a micro SD card to save video locally, and it has two-way audio so you can talk to someone. I find the functionality is not great, but it is functional.
Since we are talking 3D Printers, I also wanted to point out that there are a LARGE number of Wyze mounts and enclosures that can be found on Thinginverse and Printables.
These really are multi-functional devices. Monitor a printer and get a timelapse. Monitor a room. Monitor a baby’s room (another use mine have), or monitor outside your house. These devices have so many uses. For the price, they are really hard to beat.
Welcome home to freshly printed part
NOTE – January 2023 Update: As I mentioned above, the Minton Beagle Camera is an excellent replacement for several of these parts. It replaces the Raspberry Pi, Camera, and comes with the USB cord. Though, you may want to buy a longer cord if you need to reach further. It’s also made by a great guy that I have been working with in various companies for years. He’s very responsive and really is trying to push 3D Printing far. I did get a free version of the early camera, and that is the only kind of compensation I have received. I genuinely like the product and the gentleman behind the product.
Now, when I get home, I will have a couple of shipping containers finished so I can get some photos of, and show them off. This is all thanks to my remote printing setup. All of the software is free for all of this. You will have to pick up a Raspberry Pi 3 B+ or Rapsberry Pi 4 and Camera for Octoprint. (As of Jan 2023, the Raspberry Pis are STILL very expensive and very difficult to get). The remote control power outlet is something else you must buy. Finally I did pick up a long USB cord to power my Raspberry Pi 3. If using a Raspberry Pi 4, you will need a USB A to USB C or USB C to USB C depending on how you connect it. It makes life easier to be able to move your print server around and also helps to place the camera easier. This really is a very convenient setup. Heck, I live in a 2 story house. There are times I do this from my computer down stairs, and never touch the printer until the print job is done. If you have any questions about this setup, please let me know. Not all of my 3D Printers are hooked up to this setup, but my workhorse 3D Printers are.

would be nice to have coneyorbeds…or an automated print removal system…to keep printing going on one printer.
That would be pretty amazing, in all honesty. I know there is that one 3D Printer that has a conveyor belt. That is probably out of my price range.
Matter Hackers did come up with a “solution”: https://www.youtube.com/watch?v=Viy928RLsdU