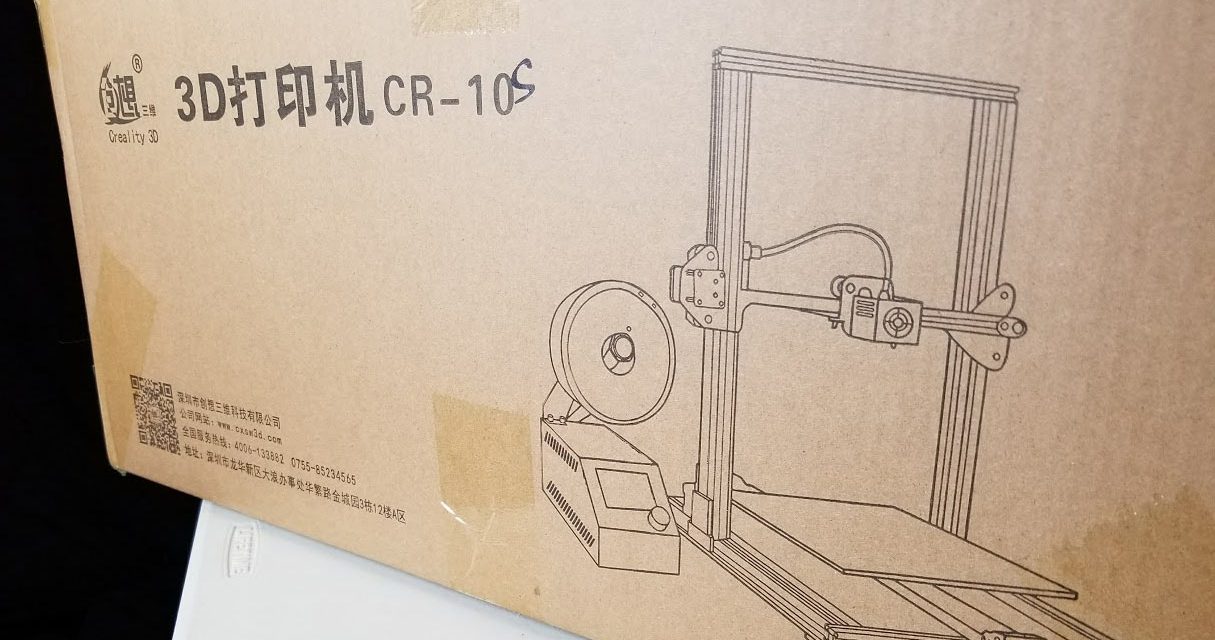
Creality CR-10S Preview and Build
Thanks to Gearbest, I received a CR-10S for review yesterday. This is not a paid preview, but the printer was sent free of charge. If you want to jump to the final review, you can click this link here. This preview guide has more initial impressions and the build video.
I created a video last night, showing me putting together this printer. I’ll post it at the end of this article. It took me 1.5 hours to build this, start to finish. Had it not been in front of a camera I would have been able to do it much quicker. Let me start out with the positives.
Pros:
- It’s big. You know a 300mm x 300mm x 400mm (roughly 12 x 12 x 16 inches) build area is going to be large. You don’t really realize HOW large it is, until it is standing in front of you. It is also very solid.
- It is a refinement of the previous CR10 including a 2nd Z rod and filament runout sensor.
- It’s easy(ish) to build.
- It has easily accessible micro SD and Mini-USB slots.
- I’d say the hype is real. There is a reason people have talked so much about these 3D Printers.
- All-metal construction.
Cons:
- The Documentation is not the best. There is text, and there are images. They do not usually correspond to each other in placement. They are also very simplistic. That being said, the printer goes together in a fairly obvious way. I had to make sure the two T-supports went on the correct sides. The instructions helped with that. It comes with a filament run-out sensor. It isn’t labeled well, and I didn’t see ANY instructions on how to mount it.
- It’s big. Won’t fit in some standard sized enclosures or on many benches. (I doubt this con will really matter to most people).
- Slow to heat bed (about 5 minutes).
- Loud. First printer I have been able to hear downstairs in my house.
First Impressions of the CR-10S

Overall, I am very impressed with this 3D Printer. It feels sturdy. I have read about people having problems with loose screws. I looked all over and didn’t notice any. I also popped open the box and had a look at the power in there. Everything seemed tight. I THINK I mounted the filament run-out sensor correct, since it seems to work well. My first print I was very happy with, as well. Using the included PLA filament, the print looked better than my previous one when I was tuning in my previous printer.
Here is a photo of the first print completed – The Containment Container from Warlayer :
This will be my go-to spot for information about the CR-10S until I get the review done. I’ll have to put a lot more hours on the printer to see how it holds up. My initial impressions are very good. I plan to basically run a stock CR-10S until the review is done, but I do plan on adding a few pieces to make it easier to use (leveling knobs are a biggie). I have started putting together a Thingiverse Collection of CR-10S upgrades. I also will be doing a Tevo Tornado vs Creality CR-10S review showing them off, side by side. If you want to see the unboxing and preview article for the Tevo Tornado, check it out here.
If you are interested in learning more about 3D Printing, I have put together a number of guides to help you out. I’ve also created a guide to upgrades for the CR10 family of printers.
Once again, I want to thank Gearbest for sending this printer. I don’t use ads on this side. I only do any funding through affiliate links. If you use one of my links on a purchase, I get a small kick-back from the store. (Gearbest, here). I figure if you are going to buy something anyhow, getting funding from that is the most unobtrusive way I can fund the site. I also keep an updated list of deals on 3D Printing from around the web.


Trackbacks/Pingbacks